Friday, September 18, 2015

Gone fishin!

We went to visit my sister-in-law and her SO back in June. They live in a small town in Georgia on a good deal of acreage. She's recently retired (early and good for her!!) and had a workshop built on the property. It's full of tools, scrap wood and very organized with huge double doors so she can wheel out tools and tables to reduce mess. I LOVED it and came home very envious but with some new skills. (Thanks Linda!)
I've wanted to learn how to use more power tools since the fence project and Linda had the patience to walk me through using a jigsaw. They're a little intimidating to me since you guide the blade yourself unlike a circular saw which has a blade guide. She pulled out some scrap wood for me, some clamps and some saw horses for the wood. Once everything was set up outside (no mess to clean up since we were outside!), she gave me a pencil and suggested I start by drawing easy shapes and then cutting. I was really surprised that it really wasn't near as hard as I thought it would be to cut simple shapes.

This is where I started...


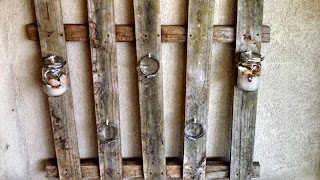
She and her SO had recently done some volunteer work on Cumberland Island off the Georgia coast and gave me some sand dollars and fishing floats that they'd found while walking the beaches. I thought they'd be great to hang at home since we have a very eclectic beach style to our home decorating.
Once I had the simple shapes down, I drew a couple of fish on some scrap wood.It did take some practice to get the curves on the fish right but I think they turned out pretty well for a first try. I used my Dremel to drill the holes for hanging the floats and sand dollars. And I originally planned on hanging these outside but decided, once they were finished, that they would be too fragile with the sand dollars for outdoors.
Since I'm definitely not a painter, I called my daughter and asked for some suggestions on how to get started. She had some great tips including marking my paint lines with tape and add shapes with my Silhouette cutter. She also suggested the use of a black Sharpie marker for outlining and hiding the not so straight paint lines. The tips worked like a charm! I used some clear jewelry line along with crimp beads to hang the floats and sand dollars once the paint was dry. 
And this how they finished up!

I used some Command strips (love those things!!) to hang them on the walls in our bar room and definitely love the way they turned out.
A big thanks to Linda for all her help and my grandson Jordan for the paint and float layout suggestions.
Again...power tools are fun and NOT scary with the right instructions and guidance!


Sunday, June 21, 2015

I haven't lost my marbles yet...

I have LOTS of these glass half stones...
I bought them years ago to fill several glass vases and bowls around the house. I dumped them into this basket a short while later because I really didn't like the way they looked. We have a very eclectic decorating style here and the vases didn't blend with the look like I thought they might. But as per my usual, I refuse to throw stuff like this away. Sooner or later something will hit my brain and I can go through my craft closet and come up with some way to get where I want end up. ;)
I ended up here...

I started here...

And used this to get to where I wanted to be...

Our window in the kitchen and the french doors to the patio both have these small windows above the normal ones. I could never decide what to do with the windows due to where they sit and how long they are. They let a lot of light into our home so I really didn't want to put up traditional curtain panels (and I'm not very traditional like that). 
Once I started looking through my closet, I realized that I had a whole basket of these stones sitting around just waiting to be put to good use. I had all of the tools, wire and crimp beads on hand but needed to find a glass friendly glue that wouldn't come loose with the Florida sun. And you know what that means?? I just HAD to make a trip to JoAnn...for the glue you know...I didn't buy anything else...OK...well maybe I did but I'll save that for another time. (All I can say is thank goodness for an understanding hubby!)
So here's how I put it all together:
The window measures 71"W x 15"L. I spray painted an old spring rod with black spray paint so it would blend in with the window frame. (NEVER THROW ANYTHING AWAY...as soon as you do, you're gonna need it! I keep stuff in my craft room closet and de-clutter it probably twice a year.) I did open the rod to be longer than the 71" measurement just in case I was off with my measuring and I wanted to make sure that once I hung the rod there would be no brass color showing.
I cut the jewelry wire into roughly 24" strands to account for the wrapping and crimping the wire onto the rods. I tried gluing the stones directly onto the wire but the wire wouldn't lay flat on the back of the stones. Since the wire is steel it has a tendency to stay curled without some weight on it.  My next attempt came with the help of scotch tape. I taped the wire to the back of each stone and then placed glue in between the tape strips.
This worked like a charm! Yes it's time consuming but it's one of the mindless steps of a craft project that keeps us from having to concentrate too hard and you can watch tv at the same time ;)
The stones ended up looking like this:

I let the glue dry overnight and took the tape off the next day. I strung each strand onto the curtain rod and hung this one in our kitchen window.
They look really nice with the morning sun coming in the window and add just enough oomph without having to hang a full curtain and loosing all that light. The stones turned the window into a giant suncatcher that we really enjoy.
I still have to make one for over the back door. Lord knows I have lots of these stones to still use. I think next time I'll crimp the strands onto the rod before I glue the beads which will save a step in the end. It would also prevent any of the strands getting tangled up while drying. I didn't think about that until afterwords when I was trying lay out the color order and lengths. It could've prevented the rearranging of the strands and kept me in line with the lengths. I ended up trimming the wire after the rod was hung because I didn't want all of the strands the same length.
The strands range in length from 12-14-1/2" and I used a total of 19 strands. I think the other window could use a few more strands. 
I do suggest that you periodically check the weight of the strands on your rod in the window. Every 3-4 strands I hung on the rod, I placed the rod back in the window. I didn't want the rod to fall and I wasn't sure how much weight the spring rod would be able to hold. Since we have tile floors in the main living areas of our home, if the rod falls...glass would be flying...not good...not good at all...

My fence project was published here - http://diyready.com/fence-with-mason-jar-lights/ They have some really cool projects on the site!


Sunday, March 29, 2015

Change up your dog collar!

I made a collar for Penny a while back that looked like this

The hardware and instructions came from Country Brook Design. They carry everything you need to make collars, leashes, etc. 
My daughter suggested trying to make an inter-changeable collar. After giving it lots of thought, I bought some 1" black webbing and 2 rolls of 7/8" ribbon. I made the collar base using the instructions from Country Brook but added velcro in 3 spots on the collar, one on either end and one in the middle. I sewed 2 pieces of velcro at either end and one in the middle. I cut the ribbon to the length adding about 1/2" to each end to turn under and add the velcro. The one attached to the collar in the photo below matches her new coat ;)
Here's a photo of the first two "covers" that I've made. I also have a purple tiger print for football season too! Making the collar this way will not only save me money but will also allow Penny to have "party collars" just like I have my "party glasses". (I have a glass for almost every occasion and love them!)
These are incredibly easy to make and will save a TON of money!
A huge "thank you" to my daughter for the idea!

Saturday, March 28, 2015

Penny's coat

The weather here in Florida is normally warm. Once in a while we catch up with some of the other Southern states with cold temps. When we adopted Penny we realized that she didn't like the cold. I HATE being cold...so does Penny. So I started looking for a coat pattern. I lucked into the instructions for measurements on Pinterest here http://www.sewdoggystyle.com/2012/09/diy-pet-coat-pattern.html. The worst part of this whole process was trying to get a 65lb boxer to stand up still while I measured and tried to fit the coat as I sewed. I used some flannel with some thin batting in between so the coat wasn't too hot but would be enough to keep her happy outside. (And yes, she has a matching collar!)
This is also the first time I tried free motion quilting. Man...I need to practice that one a LOT more! But over all the coat turned out well. I quilted around each heart and used velcro for closures so if she happens to catch the coat on something, it will come off fairly easily without hurting her.

Here's a couple of close ups of the stitching.


And I did figure out a way to make interchangeable collar covers. I made one collar with the hardware and so far we have 3 covers. One that matches this coat and 2 for football season! Pics soon to come!


Thursday, March 19, 2015

Me and the fence post

My hubby says I have a problem with clutter...maybe...maybe not. This time he said he was wrong! ;)  I found this piece of picket fence in our "back forty" as we call part of our yard. I brushed it off and kept it on the porch for weeks while I tried to work out in my head exactly how I needed to go about getting where I wanted to be. Sometimes the ideas come right away and sometimes not...

 Here's what I used to get to my end result:
I found the wicks and glass holders for the mason jars here http://putitinajar.com/store/. They have just about everything I could think of that I might want to convert any mason jars laying around the house. They even have conversion kits for wine bottles!
The fence section originally had 6 pickets but I had only ordered 5 wicks and holders. Soooo while the hubby was gone, I pulled out the circular saw and cut one of the pickets off. (First time using the saw and will definitely be doing it again! How come men don't tell you it's fun?) Then I measured the spaces for the jars. And my version of measuring is normally eyeballing it, laying a string (ok I used my tablet cord to string across the boards) and marking dots with a Sharpie marker. Then I pulled out the power drill (first time for that too and just as much fun!) and drilled a hole in each picket.
Once the holes were wide enough for the zip ties I started on the jars. I bought 5 pipe hangers that were 3-1/2" each to attach to each jar. I filled each jar with some children's play sand and some shells I had from the Charleston beaches. I added some glass beachy charms on wire around the neck of each jar. Once that part was finished, I attached the pipe hangers to the fence with the zip ties, screwed the hangers to the lids of the jars making sure to tighten the screws so they stayed put. I added oil to each jar and then screwed the jars to the lids. 
Here's a photo with 2 jars completed and the other 3 hangers attached.
And a close up of one jar


Here's the completed fence section lit with one of my coffee can lights. Start to finish, it really only took me about an afternoon. I love that it wasn't something that I had to stop and come back to because of time.
 I'm trying to come up with a way to attach hangers on the back for "legs". That way, I could move it out into the yard depending on the nights we in the yard versus on the porch. It would also make it a little safer for the porch. Right now it's just leaning against the wall. I was thinking about maybe those old fashioned drawer pulls that are coming back in style or maybe I could find some hinges that would work. Maybe I need to go wander the hardware store.
I think that it turned out very nicely for one of my "winging it" projects. And the hubby now understands a little better my obsession with "NO...don't throw that away yet!"

Sunday, March 15, 2015

I finished lots of stuff this weekend!!

Here's a pic of one of the completed tile photos. They're both now dry, framed and ready to gift! I hope they like them and hopefully, they will be a great remembrance of pets that have become necessary family members for both my niece and our friend.
(My apologies for the photo...I'm not good at that part and my sister who is lives in SC while I'm in FL. Go figure!  :)  Maybe one day I'll figure it out and they'll get better for you.)

I also finished Penny's coat (now that's been hitting the mid 80's here. Thanks to my hubby to explaining that part to me yesterday after the coat was finished. But I'm hoping for one more chilly day so she can wear it at least once.) along with a new collar that now includes the ability to change her look without owning 25 collars. I love this idea and many thanks to my daughter, Emy, for the idea. She is creative in her own right but on a way different level than I am. One day I'll walk around the house and take some photos of her work and post them for you. 
Pictures and instructions for the collar and blanket to come later...maybe even good photos!


Friday, March 13, 2015

Tile photos

One of our friends has a rescue dog that has been diagnosed with cancer...actually, they have two rescues...one for her and one for him :)   They have been driving him to chemo once a week for treatment and spend a lot of time with him. I thought that it would be nice to give him a remembrance photo for him that would be, hopefully, just as special for him later as Chi (the dog) is now. I hope he likes it!
I'm going to try to explain the process but if you have any questions, let me know and I'll get back to you as soon as I can.
I start these with a black and white photo that has been re-sized to 8" x 8". The photo is then cut into 4 4" pieces. With paper formula ModPodge, I glue each 4" square to a piece of ceramic tile from the home improvement big box store. These tiles usually run less than 25 cents each so keep a stack on hand...you never know. And this really is one of those projects that never fails to come out perfectly every time as long as you measure and cut the 4" squares carefully to begin with.
So...here's what I started with:
I converted the file to a black and white photo in Microsoft Word. I guess you could use Photoshop or something else more "serious" but this project is easy and Photoshop makes my head hurt trying to figure out all of the tools.
Once your photo is printed (I use my regular inkjet printer), cut the photo into 4" squares. This part is important because the tiles come 4-1/2" x 4-1/2". You need that 1/4" inch overhang on each side to make the tiles look nice.
I cleaned each tile with alcohol to make sure the store dust and body oils are gone. (This prevents any issues with the glue later.) I used a sponge brush to spread the ModPodge onto one tile at a time and place each piece of the photo into place. If you make any mistakes, like laying down your photo squares crooked, now is the time to correct it. You can run the tile under running water and the paper and glue will wash off and you can start over once the tile is completely dry. BUT remember these tiles are ceramic and they won't dry right away. I have reused them in the past to correct errors but like I said, you have to allow for the water to dry before trying again. And you also have to print a new photo ;)
The ModPodge needs to dry for at least two hours before you go on to the next step. Once the tile is dry, you start adding top layers of the ModPodge. My personal preference is 3-4 coats. I think that it helps smooth out any bubbles you may have missed and will make sure that the photo is completely adhered to the tile. If the top layers aren't heavy enough you may run into an issue with the paper trying to "lift" off the tile. Now...ask me how I know this!
And this is what you will end up with at this point:
I love these photos done this way! Once the tiles are fully dry, use a shadow box type frame for the tiles. I normally buy mine at Michaels...the kind with the black velvet background when they're on sale and I have a coupon ;) I use E6000 glue to adhere the tiles to the velvet and place something heavy on top of the tiles to hold them down. (This is why it's important to let the photo completely dry before going on to this step.) I've tried letting them dry on their own and the glue and tiles are happiest with a book on top until the glue dries....it squishes the glue into all the spaces on the back of the tile. I've made 3 or 4 of these (including a sonogram photo for my daughter) and as long as I don't rush the drying time, no problem! They hang on the wall beautifully without any worries about the tiles coming unglued.  These can be made in a day including overnight drying time if you start first thing in the morning and are careful. So they would also make a great (and I'm told very impressive) last minute gift for someone special.
This is one I've started for one of my nieces. She introduced us to our rescue, Penny, who is an absolute joy to have around and I thought it would make a great thank you. 
Those are her dogs and she does some incredible agility training with them. She also works at a vet's office as a tech and does animal rehab work as well!
I should have both of these framed tomorrow and will try to remember to post pictures of the finished projects then.
Here's the very first one I tried. I made it as a surprise for my husband on his birthday several years ago. It's a photo of the clock tower at Clemson that I took on one of our many trips up there. (He's a die hard Clemson fan.) The only difference between this first one and the ones after is I figured out that I didn't have to go through all of the trouble of tissue paper fighting with my printer...regular printer paper works just fine. The original directions using tissue paper can be found on instructables.com. The tissue paper is a BEAR to get through the printer. You need to add double stick tape to the tissue paper, stick it to the printer and pray really hard that nothing goes wrong. If the tissue isn't taped down absolutely correctly, it will tear and lead to many curse words being uttered!


Thursday, February 5, 2015

Marbles are not just for the kids!

https://s-media-cache-ak0.pinimg.com/originals/e3/96/5b/e3965bab10e0c694dbccbda897540d69.jpg

I have this frame sitting on the night table in our guest bedroom. It was made with some leftover glass marbles and a simple glass frame. I used:
E6000 glue (LOVE this stuff!!)
Glass frame
Glass marbles/stones from the dollar store left over from other projects

I started by cleaning the glass to remove any oils and/or finger prints. I did a practice run to make sure I was happy with the design before I started gluing. Once you have your design in place, DON'T REMOVE THE GLASS STONES! You can glue them down one at a time as they lay on the glass. This stopped me from having pieces rolling everywhere as well as forgetting where I originally had them placed.
I used the E6000 on each piece of glass and kept the frame flat on the table while I waited on the glue to dry. I left the frame flat on the table overnight (min. 24 hrs for dry time). I "shook" the frame the next day to make sure everything was secure before I really stood the frame up.
I haven't hung this...the frame came with one of those stick posts that allows you to stand the frame up and still see through the glass. I'm not sure I would hang this on the wall due to the weight of the frame and glass but it looks great on the bedside table when the light shines through it.

Monday, February 2, 2015

Nail polish swirled glasses

We've all seen the posts using nail polish and dipping glassware to create swirls on the glass. Well...this is one of those time that was a Pinterest fail but a win in another way. Using shot glasses and wine glasses from the dollar store and nail polish from Wally World, we began trying this. We realized quickly that this wasn't going to work according to the photos and directions on Pinterest so we went in another direction completely. Again using my Silhouette, we cut initials, palmetto trees and some other shapes from vinyl to use instead. We used the outlines and stuck them to the glass. We then painted the interior of the stencil with nail polish and let it dry. Once it dried, we used a clear coat polish to add some shine and seal the colors. So far, my wine glass with the dots has held up well although I do hand wash it.


We did use cotton swabs and polish remover to clean up the excess paint where it was needed.
And if you look closely at the shot glass in the photo on the far left, you can see the original swirl idea and badly it worked. BUT we were happy with the hand painted results anyway and thought the glasses turned out nicely.

Saturday, January 24, 2015

Stamped washer necklace

When my granddaughter was here in December she was looking for something special that she could make for her mom for Christmas.  My granddaughter makes a huge effort to make every gift something memorable for her mom. They have an incredibly close relationship and it's absolutely wonderful to watch them interact.
We decided to do what all good craft addicts do...we hit Pinterest and came up with this:
                                 http://media-cache-ec0.pinimg.com/originals/af/44/37/af4437b667bea3db6ef70b93283867f5.jpg
A stamped washer necklace. The ones we saw were all made with sterling silver but the only washers I had on hand were stainless steel from the hardware store. The stamps were given to me by my dad years ago and had been sitting in the garage for a while.

This whole project took us about 30 minutes and was incredibly easy. Once you've figured out what you want stamped on the washer, lay out the stamps in order. We put the washer on a metal anvil and used a hammer to stamp each letter. Once the letters were stamped, we used a fat tipped black Sharpie marker to "trace" each letter. The excess ink was cleaned off with alcohol and a soft cloth. I strung 3 beads, one for each of the kids in their birth month color, to hang with the washer. (Sorry about the photo quality...I'm trying to get better at it but like other bloggers they seem to be an afterthought once the crafts are finished.) We strung both pieces on satin cording long enough to be worn but could also be cut to use on her key chain.

I would imagine that using sterling washers would be easier because it's a softer metal than the stainless steel but the stainless will probably hold up longer due to the hardness. You can find the stamp sets in 3 sizes at Harbor Freight along with coupons and locations in your area.

All in all, she was very happy with the way it turned out. And again another "instant gratification" project for us to complete in our week together!

Wednesday, January 21, 2015

Sharpie tile tabletop


http://media-cache-ec0.pinimg.com/originals/29/a6/67/29a6674108be1454e1f5d633dab8e58c.jpg

 Thrift store table with "Sharpie painted" tile top

I found this table at a local thrift store. I loved the iron legs but the top is made from a pressed board that had started to rot. I've seen Sharpie markers used for painting before but had never tried it. I thought this would be the perfect place to try it because the top of the table fits a 12 x 12 tile perfectly. 
I went to our local big home store and bought a 12 x 12 matte finish porcelain tile for about $1 and came home and went to town with the colors. Once the ink had set, I used an eye dropper and some rubbing alcohol which causes the ink to "run". If you drop salt on the tile before the ink has a chance to dry, it causes the spots that you see on the tile. I used sea salt on this tile and the size of the salt crystals will determine the size of the spots. Regular table salt will make smaller spots. The salt needs to be left on the tile until the alcohol completely dries and then brush it off lightly.
So to make this tile, you'll need:
1 12 x 12 matte finished porcelain tile
Sharpie markers
eye dropper
rubbing alcohol
Salt - either sea salt or table salt depending on the effect you're looking for

Here's a picture of the tile after it was dry. 
http://media-cache-ec0.pinimg.com/originals/91/57/28/915728e987a4a77c06c9b1ac3455dee2.jpg

Sunday, January 18, 2015

Holiday canvases with my Silhouette cutter

http://media-cache-ec0.pinimg.com/originals/ac/0a/aa/ac0aaabe9db195c186992b5e76ae6c22.jpg Lighted Holiday canvas


I made this back during December when my granddaughter was visiting from SC. We ended up making 3 all together. We used the Silhouette cutter and some vinyl along with battery operated lights, acrylic paint and glitter glue from the dollar store. Once the pattern of choice was cut from the vinyl and applied to a plain white canvas, I used an eyelet setter to make the holes for the lights. Once I added the glitter glue to help hold the lights in place, they stood out even more. I used double sided tape to hold the battery box on to the back of the canvas. We made 2 others using the vinyl outlines as templates instead of the vinyl itself and painted them. The holes were made before painting just to make sure we had the placement right with the templates and to make sure that the canvas would hold up with the eyelet cutter. All in all, this was a very simple project and took 2 afternoons just to allow for the paint and glitter to dry. My granddaughter made a large Christmas tree that she gave to one of her other grandmothers as a Christmas present. And I'm sure it will be treasured as another of her handmade gifts. We really enjoy our time crafting and I look forward to her visits every few months!  


Friday, January 16, 2015

Penny

And this is our shiny Penny!
Snuggling and napping
Definitely not an early morning person!!


She's been an absolute joy to have here and just like us, is full of quirks...(I always say I'm not crazy I'm quirky!) She likes to kiss you awake in the morning and no man is left safe in the bed. Everyone has to get up and out of bed. Once she's been out to do her morning routine, she's very quick to jump on her quilt, snuggle under the closest blanket to make sure her head is in the dark, and is soon snoring again...UNTIL 8:00. Then it's breakfast time and she'll be pacing the floors looking at you like "Don't you get it?? Didn't you look at the clock? Where's my food?"
But we do love her dearly and she's a lot of fun to have here. She plays "hide and seek" with my husband in the house and what I've come to call "Get off the porch Penny" with me in the yard. It's our version of chase with her using the back door as her "base". We have a large yard that was slightly intimidating to her when she first got here so it took some encouragement to get her "off the porch" and running around. She seems to have picked up the phrase as a sort of invitation to play chase with me...which can make getting to the door interesting at times because she's a fast runner and loves to sneak up behind me and cut me off right before I hit the concrete! 
Like I said, we love having her here and she's been a wonderful attitude adjustment for me!


Thursday, January 15, 2015

Party lights!!

This is our bar room known to normal people as a dining room. When we bought our home back in 2005, we had 2 main requirements. My husband wanted a large kitchen and I needed a space for this bar. (He did the majority of the cooking at the time.)
My father was a contractor in Charleston for years as was my grandfather. He did some renovation work at one of the old yacht clubs in Charleston and was asked to remove the antique mahogany bar (why??). My mom fell in love with this corner piece and asked that my dad bring it home for her. He did. It was all good until they moved and didn't have enough space for it. She was going to ditch it until I begged her to hang on to it for me until I had a place for it...little did she know it would take years!
I really love this room...and the party glasses...and the lights...and just about everything in it makes me happy. I keep/make a party glass for just about any occasion as well as a great supply of fun party napkins.
I keep my wine corks as do most wine drinking crafters. I also have a tendency to pick up items at craft stores that are clearance items. (You never know when you might need them!) Going through my "stash" one day, I found a string of indoor Christmas lights that I had bought on clearance. When I did a search for "wine cork crafts" I found nothing that included lights. So here's what I did:

I took the lights, some eye hooks from the hardware store, jump rings, school glue and my corks and made me some party lights! I dipped the ends of the eye hooks into the glue and "screwed" them into each cork. I let the glue dry over night and then, using the jump rings, attached each cork between each light.

I used Command hooks to hang the lights to avoid any damage to the bar. It will also make removing the lights easy if I ever decide to change them...ping pong balls maybe? I've seen those done on Pinterest and think they would be awesome on colored lights! Maybe I need to look for a string of outdoor lights?


Wednesday, January 14, 2015

Reconstructed sweatshirt

http://media-cache-ak0.pinimg.com/originals/c6/43/33/c643337d87f160d2978e86fc344a8ad0.jpg 
I love this sweatshirt!!
I had a plain grey hoodie in my drawer that I very rarely wore. It needed something on the front and sometimes the hoods on these things drive me crazy! I was considering cutting the hood off and adding some sort of collar but then...my daughter came to visit and brought some SC Select Club Whiskey that came in this nifty velvet bag.
She left me the bag when she went back to SC and I thought I would see what I could do with it. 
This was a really simple project and is a great way to keep those leftover bags that hold special weekend memories and not just throw them in a drawer as we all have a tendency to do. 
The first thing I did was cut the front and top off of the bag. Once it was centered and pinned to the front of the shirt, I used a zig zag stitch to attach it making sure to leave the pockets free. (The zig zag lets the knit of the sweatshirt still move.) I may still end up cutting off the hood but for right now I love this! I think about her every time I wear it! 
The whole thing took about an hour from start to finish and I was able to wear it to a neighbor's party that evening.


Tuesday, January 13, 2015

New dog collar for Penny!

                                   "Dress up" collar for Penny!
 First let me say we never thought we'd be the type of dog owners that needed to dress up our dog...HOWEVER...when I started looking at a new collar for Penny, I found nothing that really stood out as "Penny" and what I found was EXPENSIVE! So I got online and started looking for collar patterns. The pattern I used came from here. She has several dog related patterns. I found Country Brook Design that carries everything dog collar and leash related hardware and webbing to make your own. Not only do they carry a variety of sizes and styles, but their shipping is absolutely fantastic! (I received my order 2 days after it was placed.) The instructions are included in the package which makes this a complete "no brainer, instant gratification" sewing project. Perfect for a Saturday afternoon sewing project! With the exception of the buckle hardware, I did complete the whole project with leftovers from my sewing stash.
Included in my package was the following: 1" side release buckle, 1" triglide slide and 1" D-ring. (I ordered a 10 pack knowing that if it was really as easy as it looked, I could make several of these not only for Penny but for friends in the neighborhood as gifts.) The package also includes the measurements for the webbing or ribbon that you want to use and sewing instructions for the different stitch patterns you will need to know how to do.
This one was so easy that Penny can now have "party collars" just like I have a stash of "party cups"! The whole project took approximately 30 minutes from start to finish and was incredibly easy. If you decide to try this, my only suggestion would be to use your zipper foot. It made getting close to the buckles and slide much easier than using a regular sewing foot. I used some leftover felt flower "buttons" that I had left from another project just to dress it up a little. And it does give her a little "attitude" when she wears it on walks around the neighborhood.
My daughter has asked me about trying to use a heavy grade hook and loop tape on the base so she could use the same base but change out the ribbons along with the calendar. I think this is certainly doable and will keep you updated on the progress!

Sunday, January 11, 2015

Penny's jar

Custom "cookie" jar for our new adoptee!


We recently adopted a 6 year old boxer named Penny. She's been an absolutely wonderful addition to our home. Due to some health issues, I'm not currently working and having her with me during the day has brightened up my attitude immensely! Although Penny has added some work and time to my days she's been worth every minute. She seems to sense when I'm having a bad day and doesn't mind snuggling on the couch with me and plays like a new puppy on the days we can hang out in the yard together.
Needless to say, since she's an "only child" (we're empty nesters) she's quickly becoming spoiled but in a good way. She needed the one on one attention as much as I needed the company. She's also become a huge "princess" for my husband. Since he's never had a true pet, he really didn't understand how quickly they can take over your heart.
I've been slowing learning how to add some custom Penny items to her "stash" of necessary things. One of the first items I made was a customized cookie jar. I used my Silhouette cutter along with some contact paper, etching cream and white paint to personalize it. The etching cream is simple to use but I have found with other projects that if you paint on a thin layer of white paint then wipe it off with paper towels the etching really stands out. I've never tried other paint colors but I would guess that you would get the same results.

Saturday, January 10, 2015

Coffee can yard lights

ICoffee can lights for the yard!


I've been saving metal coffee cans for a while now without having anything in mind to really do with them. I just knew I could use them for "something". (I know I'm not the only one out there that does that, right?)
I finally pulled them out the other day. I pulled out my Dremel and starting thinking about designs. I managed to drill our last name into one and once I put a candle inside, the effect was just what I was hoping for!
I first washed and dried the can. I used a fat Sharpie marker to write on the can knowing I would be spray painting the can later. I used the Dremel to drill holes for the outline of our name and some drainage holes in the bottom. Once the drilling was finished, I used a BBQ rated spray paint for the outside. Using sand to weight the can down, I inserted a candle and since I left the inside unpainted, the light really reflects well. I've done 2 others with just drilling holes in random areas that work well. I still have 2 others to play with and I think I need to find some easy shell designs for those. I plan on using some solar lights that way they can stay in the yard all the time.

Tshirt remake

I saw this shirt about a year ago and absolutely fell in love with the idea. So like a lot of you, I promptly pinned it thinking that it would be one of those instant gratification projects that I love. But then I put the idea away but kept going back to it with the thought that I have plenty of scrap fabric and she really made it seem pretty straight forward.
Last week I was cleaning out some old clothes to donate. One of the first things I grabbed was a Tshirt...and then...I said NO! Now I can do that Tshirt makeover I saw! My normal "m.o." with these sorts of projects is not to measure and just jump right in. In this case it worked out perfectly!  I'm pretty broad shouldered and hate tightly fitted shirts. I hemmed what would become the sleeve end first, sewed the sides using a knit zigzag stitch and then hemmed the bottom of the cotton fabric even with the Tshirt. Since the fabric is stripped,  it's going to match several things in my closet and is loose fitting just like I wanted.
All in all...a win for me! And a big thanks to marieC on Crafster.com for the original post. It's filed under "fix for a too small tshirt".http://media-cache-ak0.pinimg.com/originals/3f/b6/8e/3fb68e95b7d0a86f8a7099ce3f37602d.jpg